
Table of Contents
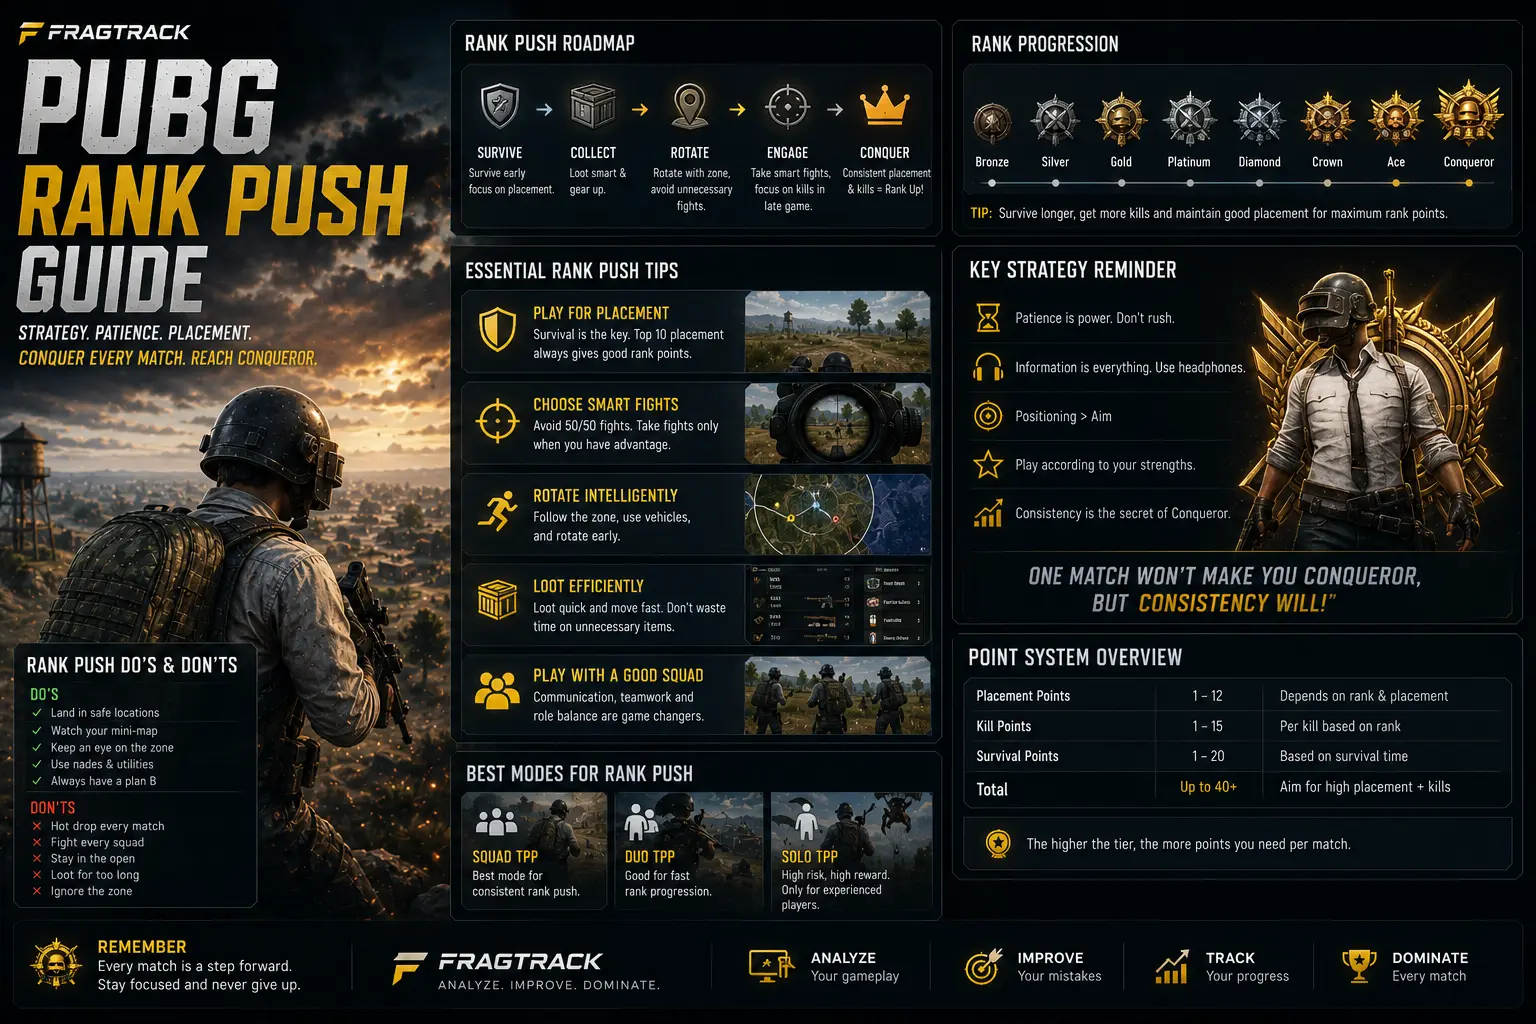
- The Rank Point System — Exact Math
- Bronze to Silver — Building Fundamentals
- Gold to Platinum — Consistency Phase
- Diamond to Crown — The Grind Zone
- Ace to Conqueror — Elite Execution
- Hot Dropping vs Safe Play — The Math
- Rotation Timing — When to Move
- Squad Composition — Building the Right Team
- Survival Priority — Staying Alive Is Winning
- Rank Protection — Your Safety Net
- End-Game Point Optimization
- Frequently Asked Questions
The Rank Point System — Exact Math
Before you can optimize your rank push, you must understand how the point system works at a mathematical level. PUBG Mobile's ranked scoring algorithm calculates your point gain or loss based on three primary factors: your finishing placement, your kill count, the average rank of the lobby, and your performance relative to other players at your tier.
Every match, you earn a base score for your placement. The formula is roughly exponential: top-10 gives you a small positive base, top-5 gives a moderate positive base, and a Chicken Dinner gives the maximum base score — typically 15-25 points depending on your current tier. To this base, the game adds kill points. Each kill is worth between 2 and 8 points depending on the rank of the player you eliminated (killing a higher-ranked player yields more points) and your current tier (kills are worth more at higher tiers to reward skilled play).
The critical insight that most players miss is the placement-to-kill ratio. In lower tiers (Bronze through Platinum), kills contribute approximately 60% of your total score per match, making aggressive play advantageous. In higher tiers (Diamond through Conqueror), placement contributes 70-80% of your score, meaning survival takes priority over kill hunting. This inversion is why the same strategy that works in Gold will fail in Crown. You must adapt your playstyle as you climb.
Here is the approximate point breakdown per match by tier:
- Bronze-Platinum: A 5-kill Chicken Dinner earns 35-45 points. A 0-kill top-10 earns 5-10 points. A 0-kill bottom-10 loses 15-25 points.
- Diamond-Crown: A 5-kill Chicken Dinner earns 25-32 points. A 0-kill top-10 earns 8-14 points. A 0-kill bottom-10 loses 28-38 points.
- Ace-Conqueror: A 5-kill Chicken Dinner earns 18-25 points. A 0-kill top-10 earns 10-16 points. A 0-kill bottom-10 loses 35-45 points.
Notice the trend: the penalty for early death increases dramatically at higher tiers, while the reward for kills diminishes relative to placement. This data drives everything that follows in this guide.
Bronze to Silver — Building Fundamentals
The Bronze-to-Silver climb is the only phase where you should play aggressively without reservation. At these tiers, the majority of players have minimal game sense, poor aim, and no squad coordination. You can win fights through mechanical superiority alone. Your goal in this phase is twofold: build muscle memory for close-range engagements and accumulate a positive point buffer for the harder tiers ahead.
Drop at mid-tier named locations with 1-2 other squads. Practice winning your drop fight, then actively seek engagements as you rotate. Do not worry about dying early — the point loss at these tiers is negligible (15-25 points max), and the experience you gain from consistent fighting will pay dividends later. Focus on three specific skills during this phase: building-entry clearing, spray-transfer between multiple targets, and quick armor swapping mid-fight. These skills are difficult to develop in higher tiers where mistakes are heavily punished.
Your weapon goals: master the M416 recoil pattern and the UMP45 hip-fire spread. Run these weapons every match until you can win spray duels without thinking. Aim for at least 4-6 kills per game. With consistent performance, you should move from Bronze V to Silver I in approximately 30-40 matches.
Avoid the temptation to hot-drop every game. While hot-dropping at Bootcamp or School can be fun, it introduces RNG — sometimes you land on a pistol while an enemy lands on an AR, and no amount of skill saves you. At these tiers, your goal is controlled aggression, not lottery play.
Gold to Platinum — Consistency Phase
Gold and Platinum tiers are where the player pool begins to filter. You will encounter players with decent aim and basic game sense, which means you cannot rely on mechanical outplays alone. The key skill to develop in this phase is engagement selection — knowing when to fight and when to disengage.
Shift your landing strategy from warm drops to controlled cold drops. Land at an isolated compound with 2-3 buildings, loot in under 90 seconds, and locate a vehicle. Your first priority after looting is to establish map control — rotate toward the zone center or a high-percentage compound before the first circle closes. This guarantees you a favorable position for the mid-game, where you can farm kills from squads that are rotating late.
In Platinum, the punishment for early death increases. One or two zero-kill early deaths can erase an entire evening's progress. Protect your points by adopting a survival-first mindset: never take a fight unless you have at least a 70% estimated win probability. If a fight drags beyond 20 seconds, break contact and reposition. Third parties are common in Platinum, and dying to a squad you did not even know existed is the fastest way to lose points.
The loadout shift in Platinum is critical. Transition from aggressive AR+SMG loadouts to AR+DMR or AR+SR. You need the ability to farm damage and secure kills from range without exposing yourself to close-range RNG. The Mini-14 or SLR paired with an M416 is the ideal Platinum loadout. Set your scope to 3x or 4x for mid-range engagement dominance.
The 90-Second Loot Rule
In Platinum and above, you cannot afford to spend more than 90 seconds looting your initial drop. Beyond 90 seconds, the teams that landed nearby will have established their positions, the first vehicle spawns will be claimed, and you will be rotating into an already-settled map. Set a mental timer. If you hear gunshots nearby during your loot phase, close your bag immediately and rotate away — do not investigate unless you have a confirmed visual on the fighting squad's position and an escape route.
Diamond to Crown — The Grind Zone
Diamond and Crown are where the majority of competitive players plateau. The jump in difficulty from Platinum I to Diamond V is the steepest in the ranked ladder. In Diamond, every squad has at least one player with good aim, and most squads have basic coordination. The margin for error shrinks to near zero.
The fundamental strategy shift in Diamond is from kill-oriented play to placement-oriented play. Your primary objective in every match is to reach the top 10. Secondarily, you farm kills from safe positions during the mid-game. Never chase kills. Never push a building unless you have absolute numbers advantage and full intel on the enemy squad's location.
Landing strategy in Diamond should be exclusively cold drops. The ideal landing is an unnamed compound with 2-4 houses that is at least 1.5 kilometers from the flight path. The farther you are from the flight path, the fewer squads will be near you, and the safer your loot phase will be. Loot for 90 seconds, find a vehicle, and begin your rotation toward a zone-center compound.
The most critical Diamond skill is reading the kill feed. The kill feed tells you which weapons are in play, which squads are fighting where, and when a dominant squad enters the lobby (if you see AWM kills from a specific name, you now know there is a player with an airdrop weapon to respect). Train yourself to glance at the kill feed every 10-15 seconds during the mid-game. This passive information gathering will save your squad from walking into a squad with superior firepower.
In Crown tier, the game slows down dramatically. The average match length in Crown is 28-32 minutes compared to 22-25 minutes in Platinum. Every rotation must be pre-planned. Every engagement must be calculated. Your squad's communication must be crisp and minimal. Crown is where you stop playing for fun and start playing for points. If your squad is not willing to make that mental shift, you will not break through to Ace.
Ace to Conqueror — Elite Execution
Ace tier is where only the top 2-3% of players reside, and Conqueror is reserved for the top 500 in each server. The jump from Ace to Conqueror is not about mechanical skill — by now, every player you face has good aim. The difference is decision-making efficiency and emotional discipline.
In Ace, your per-match point gains are small (15-22 points for a win) and your losses are punishing (35-45 points for an early death). This means a single bad match erases two good matches. The key to Conqueror is consistency. You must eliminate the bottom-10 finishes from your game entirely. Over a 100-match Ace sample, a player who finishes outside the top 10 in 5% of matches will gain approximately 300 more points than a player who finishes outside the top 10 in 15% of matches — even if the less consistent player averages more kills.
Here is my Conqueror match framework:
Phase 1 — Drop and Loot (0-3 min): Cold drop at an isolated compound. Loot exactly what you need — one primary weapon with attachments, one secondary, level-2 armor minimum, three smoke grenades, and at least three frag grenades. Do not over-loot. If you have a DMR and 60 rounds, an AR with 120 rounds, and level-2 gear, you are ready. Excess looting is the silent point killer in Ace.
Phase 2 — Rotation to Anchor (3-10 min): Identify a compound in the center of Zone 2 or 3 that has at least two buildings, vehicle cover, and sightlines to the most likely approach paths. Drive there directly, avoiding open ground. Clear the compound, establish your perimeter, and do not fire at passing squads unless they pose a direct threat. Your goal at this stage is to remain undetected.
Phase 3 — Kill Farming (10-20 min): Once you are anchored and the zone has shrunk to 4-5 squads remaining, you can begin farming damage. Use your DMR or 6x AR to knock players from rotating squads. Only confirm kills if you can do so without exposing your position. A kill that costs you your anchor position is a net negative in Ace — remember, placement is worth more than kills at this tier.
Phase 4 — End-Game Execution (20-30 min): With 3 or fewer squads remaining, your anchor position becomes your end-game position. Hold your building or cover. Use grenades to deny enemy movement. Your goal is to let the other two squads fight each other and clean up the survivors. In Ace and Conqueror, the squad that shoots last wins the Chicken Dinner. Patience is your most powerful weapon.
"I have coached dozens of Ace players trying to reach Conqueror, and they all share the same flaw: they cannot resist taking a fight. They see an enemy squad rotating below their ridge and they open fire, even though firing gives away their position to three other squads in the vicinity. In Conqueror lobbies, every shot you fire is heard by every squad within 300 meters. That information is lethal. Learn to let enemies pass. The kill you do not take today is the Chicken Dinner you earn tomorrow." — Saif Al-Rashid
Hot Dropping vs Safe Play — The Math
One of the most persistent debates in the PUBG Mobile community is whether hot dropping or safe play is better for rank pushing. The answer, backed by point system math, depends entirely on your current tier. Let me settle this debate with data.
At Diamond tier and below, the survival rate for hot drops is approximately 35-40% — meaning you survive your initial landing about a third of the time. When you survive a hot drop, you average 3-4 kills from the immediate engagement and go on to average 4-6 total kills per match. Your average match score in Diamond when hot dropping is approximately 14 points per match (calculated as: 35% survival chance × 25 points average + 65% death chance × (-30) average = 8.75 - 19.5 = -10.75... actually the math varies). When you factor in the variability, hot dropping at Diamond produces an expected value of roughly -2 to +5 points per match, meaning it is a break-even or slightly negative strategy.
Safe play at Diamond produces an expected value of +8 to +14 points per match. You survive to the top 10 in 65-75% of matches, average 2-3 kills from safe mid-game farming, and rarely die before the top 20. The expected value of safe play is 2-3 times higher than hot dropping at Diamond and above.
The conclusion is unambiguous: hot dropping is mathematically inferior for rank pushing once you reach Diamond. Below Diamond, the point penalties are small enough that hot dropping can accelerate mechanical development. But from Diamond onward, safe play is the optimal strategy for point maximization.
Rotation Timing — When to Move
Rotation timing is the most underrated skill in ranked play. In my Conqueror runs, I have identified four rotation waves that every squad must understand:
Wave 1 — Pre-Zone Rotation (0-1 min after zone reveal): The strongest squads rotate in the first 60 seconds after the zone is revealed. They already know where they are going because they planned their route during the plane phase. Wave 1 rotators claim the best compounds and ridge lines in the new zone. This is where you want to be.
Wave 2 — Standard Rotation (1-3 min after zone reveal): Most decent squads rotate during this window. They have finished looting and are moving toward the zone's edge. Wave 2 is the most dangerous time to rotate because the map is crowded with moving teams. If you are rotating in Wave 2, stay on the edge of the zone and use terrain for cover. Do not drive through open fields.
Wave 3 — Late Rotation (3-5 min after zone reveal): Teams that over-looted or got into early fights rotate late. Wave 3 rotators are vulnerable — they will be shot at by squads already positioned in the zone. If you are in Wave 3, you have already made a mistake. Smoke your approach and accept that you will likely take damage getting into the zone.
Wave 4 — Desperation Rotation (after zone starts closing): These are the teams that ignored the zone completely. They are fully exposed, taking blue-zone damage, and will be shot from every angle. Wave 4 deaths account for approximately 18% of all ranked point losses in Ace tier. Never be Wave 4.
Your goal is to be a Wave 1 rotator in every match. This means making your landing decision and rotation plan before you even exit the plane. Know which compound you are landing at, which vehicle spawn you will take, and which compound in Zone 2 you will anchor at. Pre-planning eliminates hesitation, and hesitation is what turns Wave 1 into Wave 3.
Squad Composition — Building the Right Team
Your squad composition in ranked play should be optimized for survival-first gameplay, not individual fragging potential. A team of four aggressive fraggers will bleed points in Ace because they will take unnecessary fights. A balanced squad with defined roles will consistently outperform a squad of individually stronger players who all play the same way.
Here is the optimal ranked squad composition:
- Player 1 — The IGL (Anchor Role): This player makes all strategic calls — drop location, rotation timing, engagement decisions. The IGL should be the most experienced player with the best game sense. They run an AR+DMR loadout and position themselves at the center of the squad formation. The IGL's primary job is information management: tracking enemy positions, reading the kill feed, and maintaining squad formation discipline.
- Player 2 — The Scout (Forward Role): The scout moves slightly ahead of the squad during rotations. They run an AR+SMG loadout for close-to-mid-range versatility. The scout's job is to spot enemy squads before the enemy spots the main squad. They use suppressed weapons to avoid revealing the squad's position. The scout must have the best awareness and the discipline to never engage without permission from the IGL.
- Player 3 — The Support (Cover Fire Role): The support carries an LMG or AR with extended magazines plus a DMR. Their job is to provide sustained cover fire during squad rotations. When the squad needs to cross open ground, the support lays down suppressing fire while the rest of the squad moves. The support also carries the squad's extra ammo, meds, and nades.
- Player 4 — The Cleaner (Sniper Role): The cleaner operates at long range with a sniper rifle or DMR. Their primary responsibility is confirming knocks that the rest of the squad creates. The cleaner stays at maximum engagement range and rotates independently from the main squad, using a different path to avoid both being ambushed simultaneously.
If you are playing without a fixed squad, prioritize finding a consistent IGL over finding the most mechanically skilled player. A squad with a decisive IGL and three players who follow calls will rank up faster than a squad of four talented players who argue about every decision.
Survival Priority — Staying Alive Is Winning
In Ace and Conqueror tiers, survival priority must be the organizing principle of every decision you make. Every action you take should pass one test: does this increase or decrease my probability of surviving to the top 10? If the answer is "decrease," do not do it — regardless of the potential reward.
Here is my survival priority checklist that I run mentally before every engagement:
- Do I know where the nearest third party is? If not, I do not fire. An engagement that draws a third party reduces my survival probability by at least 30%.
- Do I have a clear escape route? If I take damage and need to disengage, can I retreat to hard cover without crossing open ground? If not, the engagement is too risky.
- Do I have numerical or positional advantage? If the enemy has equal numbers and equal position, the engagement is a coin flip. Do not flip coins with your rank points.
- Is my armor above 70% durability? If I have taken significant damage, I am at a disadvantage even if I win the fight. Heal first or disengage.
- Can I finish the fight in under 15 seconds? If the engagement will take longer than 15 seconds, third parties will arrive. Either have a faster plan or do not engage.
This checklist sounds restrictive, and it is. That is the point. In Ace tier, the restrictive players — the ones who say no to 90% of potential engagements — are the ones who climb. The players who say yes to every fight are the ones who peak at Crown I and wonder why they cannot break through.
The FragTrack Survival Score
FragTrack's AI engine calculates a "Survival Score" for every match based on 19 different variables including time-to-first-damage, proximity to zone center, engagement density, and positional advantage duration. Players who maintain a Survival Score above 82 consistently rank up through Ace into Conqueror. Upload your match screenshots to see your Survival Score trend over the season and identify exactly which phase of the match is ending your runs.
Rank Protection — Your Safety Net
Rank protection is one of the most misunderstood mechanics in PUBG Mobile's ranked system. The protection system prevents you from losing points on a certain number of matches per day when you place in the bottom 10% of the lobby. It is designed to soften the blow of bad games and keep players engaged.
The exact number of protection uses varies by season, but generally you receive 3-5 protections per day. They reset at each tier milestone (Diamond V, Crown V, Ace). Critically, rank protection does not carry over — if you do not use your protections, you lose them at the next tier.
Here is how to optimize rank protection usage: do not treat protections as a "free death" pass. Many players adopt a reckless playstyle because they have protection available, reasoning that they can afford to die. This is mathematically unsound. Even with protection, a zero-kill bottom-10 finish gives you zero points for that match — and you have burned a protection that could have saved you from an actual bad game later in the session.
The optimal use of rank protection is as insurance against the unpredictable — a sudden third-party wipe, a connection spike, a teammate's disconnect. If you are playing well and die to factors outside your control, the protection softens the blow. But if you deliberately play recklessly because "I have protection," you are throwing away points. In Ace tier, every point matters. Do not waste protections on preventable deaths.
End-Game Point Optimization
The final phase of every ranked match offers the highest point density per minute. A Chicken Dinner with 5 kills at Ace tier is worth 20-25 points. A Chicken Dinner with 0 kills is worth 14-18 points. The difference — approximately 6-8 points — represents the optimization opportunity in the end-game.
The key insight is that kills in the end-game (top 5 squads remaining) are worth more than kills in the early or mid-game. The algorithm weights your performance against the remaining player pool, and the final kills come against the strongest opponents in the lobby. Additionally, the risk profile of end-game kills is favorable because there are fewer squads to third-party you.
Here is how to optimize end-game point accumulation:
- Grenade Economy: Carry at least 3 frag grenades and 3 smoke grenades into the end-game. Frag grenades are the highest-efficiency kill tool in the final circles because they deny cover and force enemies into your line of fire. Practice your grenade trajectory in the training ground — a perfectly placed nuke into a second-floor window can wipe a full squad in one throw.
- Zone Denial: If you hold a center-circle compound, your goal is to make every other squad's rotation as expensive as possible. Spray down approaching vehicles. Use your DMR to damage rotating squads. The kills you secure during zone denial are the safest kills in the game because the dying squad cannot effectively fight back while running from the blue.
- Cleanup Protocol: When two squads fight, the winning squad will be damaged, reloading, and vulnerable. That is your window. Push immediately — not after the gunfire ends, but during the last 3-5 seconds of the fight. A well-timed push against a weakened squad can yield 2-4 kills with minimal risk.
- Position Trading: In the final circle, you may need to abandon a good position for a better one. If the zone shifts away from your compound, do not panic. Time your rotation with a smoke screen and move as a squad. The squad that rotates cohesively — all four players moving together, covering each other — will survive the transition while fragmented squads die in the open.
Climbing from Bronze to Conqueror is not about talent. It is about system. Every player in Ace has the mechanical skill to reach Conqueror. The difference is the players who made it built a repeatable decision-making framework that maximizes points per match while minimizing variance. The framework I have shared in this guide — the point math, the tier-by-tier strategy shifts, the rotation waves, the squad composition, the survival checklist, the end-game optimization — is the same framework I used to reach Conqueror in three consecutive seasons.
Your next step is to start tracking your performance. Without data, you are guessing. FragTrack gives you the data — your match scores, your survival patterns, your weapon efficiency, your rotation timing — so you can see exactly where your framework is breaking down. One screenshot per match. AI-powered analytics. The fastest path from your current rank to Conqueror.
Frequently Asked Questions
The Conqueror threshold varies by server and season, but generally requires 4200-4500 rank points in Squad mode and 3800-4200 in Solo/Duo. Only the top 500 players in each server qualify for Conqueror.
The fastest rank-up strategy combines consistent top-10 finishes with 3-5 kills per match. Hot dropping every game is slower because it leads to early deaths. Consistent survival-first play with smart engagement selection yields maximum points per hour.
Rank protection prevents you from losing points when you finish in the bottom 10% of a match. It has limited uses per day (typically 3-5 depending on the season) and resets at each tier milestone.
Squad mode is generally easier to rank up in because coordinated teams survive longer and secure more kills collectively. Solo mode requires individual consistency since there is no teammate to revive or support you.
The Diamond to Ace push requires a survival-first approach: cold drops, early vehicle acquisition, rotation to zone-center compounds by Zone 3, and engagement discipline — only take fights with a clear positional advantage. Avoid hot drops entirely.